
Studio Something Shot List
Once upon a time we hated the idea of being "formulaic" and thought that every wedding deserved a creative and unique approach. Then we realised that couples see our images and love them - they don't care if their shots are similar to someone else's, they just want the best shots possible. For the photographer, the shot list can free up a lot of mental space - you don't have to constantly try to think of what to do next - which actually allows you to dedicate more mental space to being creative. If you're ever having an off-day, feeling a bit flat or uncreative - having a list to fall back on can be really handy. There are some key shots we've realised are really important to our clients, and we can shoot them exactly the same way at each wedding.
I've referred to "the bride and groom" for all the images, but hopefully soon I'll need to update!
OVERCOMING AWKWARDNESS (YOURS AND THEIRS).
- Speak to the couple so they’ll know what to expect before you start shooting. Tell them what you’re planning, and maybe outline a few poses so you don’t have to direct them too much.
- Tell them that the shoot is an opportunity for them to spend time together, take a break from the hectic wedding. Tell them to take deep breaths and focus on each other. Tell them that you’ll ask them to look at the camera if necessary.
- Remember that the majority of people are really awkward and uncomfortable. Try to be patient (and funny!). People can become overwhelmed - try not to push them, and take little breaks if necessary.
- To warm people up, it can be a good idea to demonstrate the poses first (maybe using the other photographer as your partner). This will make people giggle, but is also easier than giving step by step posing directions later.
- If people seem awkward, try telling them to take a deep breath and look away, and close their eyes.
- Tell them to demonstrate squinching to each other.
- Ask them to embrace, and maybe to trace each other’s faces with their nose (this will probably make them laugh).
- Ask them to practice their first dance
- Keep asking the couple to get closer (and closer and closer until they can’t be any closer)
- Give them jobs - like keep the other person warm, help them step over something
- Consider sitting poses if girls look tired
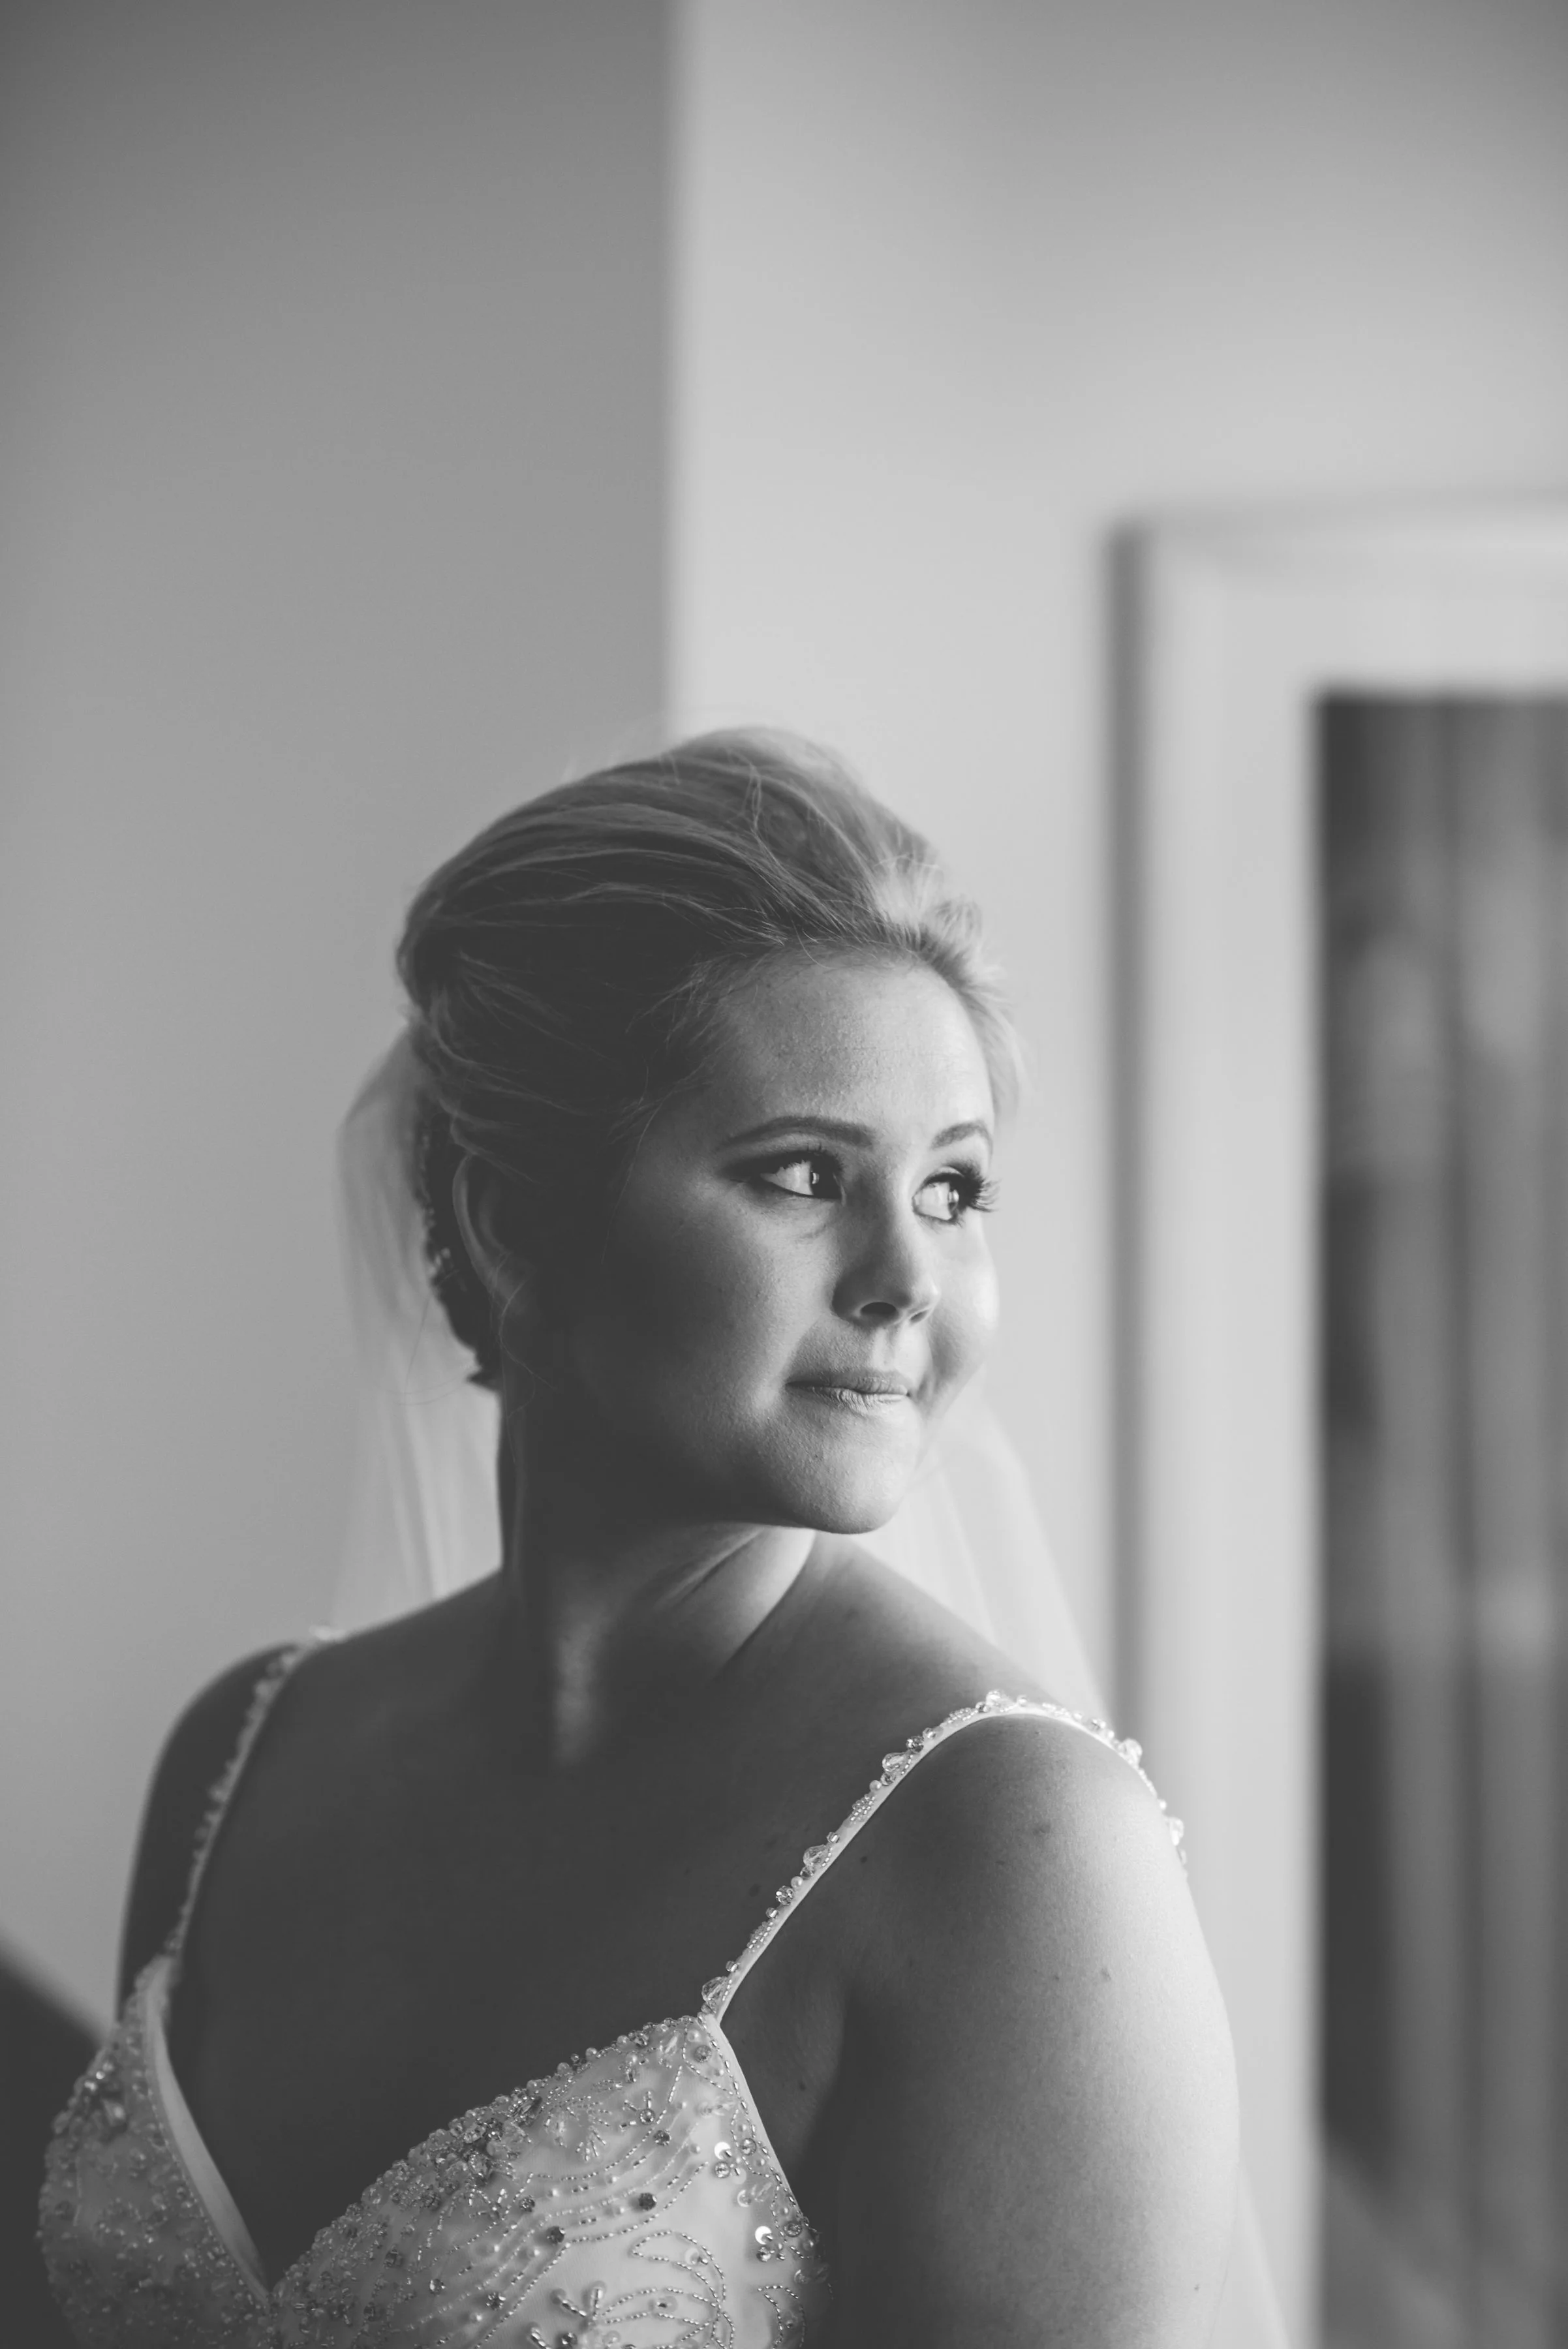
Getting ready:
People tend to get ready in hotels or their homes. Often when you arrive the blinds will be drawn and the lights will all be on. Ask if anyone minds if you turn off the lights and open the blinds. Window light is a certain temperature and strength, any other light you have on in the room (fluorescent, tungsten, halogen, etc) will cast a different colour on your subject's skin.
Read up about broad/short lighting to find the most flattering angle for wide/narrow faces. This is a good time to get to know your subject's face - big nose, square jaw? Most people are most attractive at an angle - few people look great front on.
- Positioning your camera slightly higher than the subject's eyes can often produce a more flattering image. It generally creates a slimming effect.
- For full length portraits avoid the square- straight to camera look. Without thinking too much about how sexist this is, tell women to:
- turn slightly diagonally and shift their weight to their back foot
- put the front hand on the top of their leg, creating a gap between the elbow and body
, and men to their front foot.
- It’s also important to show space between the arms and body. Bending an elbow can help highlight the subject’s waist, while flexed elbows, wrists, and knees tend to add energy.
For portraits and styling, choose a long lens - 85mm or longer. A wide lens (unless used intentionally) is unflattering - it makes noses look bigger and faces distorted.
- Portrait of the bride/ groom. Stand your subject side on to a window (blinds open, lights off).
- looking at camera
- looking out the window
- full length
- Portrait of the VIPS (e.g. bridal party, family)
- Group shot with various VIPS in same scene (e.g. Bride and Dad, Groom and brother, all the women).


4. Key details: Dress/suits, flowers, rings, shoes, jewellery, accessories - you'll know what to shoot. Pay attention to the surface you're shooting on and the direction of the light. Ideally styling (now and at the reception) should be shot on a long lens (like the 85mm, 100mm or even longer).


Ceremony
The person who shoots the groom will probably get to the ceremony first, and have an opportunity to shoot some of the ceremony details. Then focus on the groom, groomsmen and guest candids.
The person who shoots the bride should arrive just before her to get shots of her getting out of the car (I always try to remind the bride to make sure I'm there and ready with camera before she gets out of the car). There may be time for a quick portrait with her dad/ bridesmaids.
Try to get a wide shot of the whole ceremony.
Once the rings are exchanged, stay put - the kiss is coming! If you miss the kiss, after the ceremony you can say to the couple "let's just get a quick kiss!" which you can then slot back into the timeline (not ideal obviously but the next best thing!).


Congratulations and group shots
The half hour of hugs is a great opportunity for some beautiful candids. If the couple have taken our advice on the schedule there's no need to rush people into group shots.
Before they all disperse, round people up one family at a time for all the required group shots. Ask someone knowledgeable (e.g. bossy bridesmaid/groomsman) to help you get everyone together. Ask the couple which combinations of people they want so the responsibility lies with them. Choose a spot with even light - you don't want some people in mottled light and some people in shadow. Take multiple shots of each group (5 or more at the very least) - it only takes one blinker to ruin everything for everyone. Only one photographer should be taking photos of each group - the other photographer can take portraits of guests, focus on candids, or shoot the reception styling.
Be nice to people - no one likes having their photo taken, and they'd rather be having fun. A large portion of our business comes from referrals!
COUPLE and bridal party portraits - sunny, indoors, night time
Talk through tomorrow.


styling shots
These shots are important for a few reasons. Firstly, most wedding photographers do them badly - we pride ourselves on shooting styling properly. Clients love these photos (they often spend a lot of time and money getting these details right), and it's good for us to be able to share beautiful images with vendors and blogs.
Where possible, try to shoot the styling in daylight. You can still get beautiful images at night, but once everyone is in, and the ugly reception lights are on, things aren't looking as good.
Try to shoot most things on a long lens (i.e. 85mm and longer), especially the detail shots. If you're short like me, you may need to stand on a chair. Even the pulled back room shots look better when they're not shot with a super-wide lens - I'd suggest something in the vicinity of 35 to 50mm. Of course if you've got time, pop on your 24mm and get a wider angle shot, but do not take the majority of styling and venue shots with anything that wide.


Reception
- flash basics
- tips for shooting ambient / AF in low light
- lens choice
- shutter drag dancefloor tips


